You have found the right place if you're looking for scroll saw projects. Scroll saw projects are plentiful. Make a Santamobile or a wooden Nativity. Coasters and other intarsia products can also be made. Scroll saws are great tools to have at home, so make the most of them with these ideas. Just remember, you will need to use caution when cutting wood.
Making a Santa mobile
Making a Christmas mobile is easy if you are a skilled scrollsaw user. Start by cutting out two stars. The star with the hole should have one end, while the other should have the hole at the point. These pieces can be joined together with coiled wire. Then, paint the pieces to match. After that, let them dry for several days.
Building a wooden Nativity
This is an easy DIY project that will help you create a Nativity scene in your home. To make this stunning wooden nativity, you can download the scrollsaw template from i.pinimg.com. The Nativity scene when completed will look fantastic in any room. This is an exceptional gift for children. This tutorial will take you through the entire process of creating this Nativity scene.
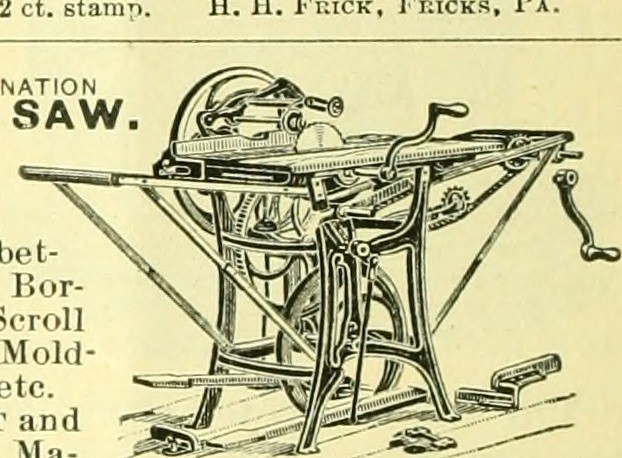
Making coasters
Scroll sawing requires a lot of skill and can make coasters difficult. Scroll Saw projects appear easier than they really are because of their precise patterns. Follow these simple steps to create coasters that can be used for any season. Just make sure that you have enough time to complete the project. Here are some tips for making coasters with your Scroll Sawer. Don't forget to take patience with this project and pay close attention.
Making intarsia
To make a scroll saw project a success, you must plan your cuts well and use the correct technique. The first step is to make sure that you have a clean cut. If you don't know what to do with intarsia you can download it from the Internet. Scroll saws need precise measurements. It is important to examine the grain patterns and take accurate measurements before cutting. Make sure you cut squarely so you can see the pattern line. A foot switch will prevent you scraping valuable wood. Another technique is to deburr the back side of the pieces before cutting them, so that you can write down the part number. To make the transitions smoother and prevent sharp bits from being cut off, double-sided tape is also an option.
Make a switch topper

A scroll saw can also be used to turn boring wood into an attractive change plate. The scroll saw can cut intricate patterns, from simple to complex, and can create simple to intricate patterns. If you're a beginner, it's a good idea to start with a simple project, such as a frog-shaped switch plate. You can find scroll saw plans and designs online and print them for future reference.
Making corbels
One of the best things about making corbels with scrollsaw projects is the fact that they're so easy to make! This simple project will give you the opportunity to add a decorative touch to your home without breaking the bank! You can create corbels for your bathrooms and kitchen. If you have some spare time, you could even make a vintage corbel. Not only will it add style to your home, it will also protect you from an income tax auditor!
Making a picture puzzle
The steps to make a scrollsaw puzzle are the same as those used for other crafts. First, you will need a piece made of 1 x 8. Once you have cut out the piece, you can cover it with painters tape or spray adhesive. This will make it easier for you to remove. Once you've done that, you can start cutting the puzzle pieces. Spread it with your fingers and the puzzle pieces will fit together.
Making a jigsaw

You can make a jigsaw with your scroll saw if you are looking for something fun to do. Many interlocking jigsaw puzzles allow you to move the pieces around without causing damage. You will need to pick pieces with matching features in order to create a scrollsaw. If you have a particular pattern in mind, it is possible to search for a jigsaw design online or find an existing one in your local library.
FAQ
How can a woodworker start making money?
Many people learn how to make furniture in order to set up an online business. There are other ways to make money if you're just starting out building furniture than selling on Etsy. You could sell at craft fairs or local events. You could also offer workshops to help others learn how to make their own furniture. You might be able to offer services like remodeling homes or making custom pieces for clients if you are a skilled carpenter.
What kind of tools are used to carpenters?
Carpenters use a hammer as their most common tool. A hammer is useful for driving nails into wood. This helps to keep pieces together when they are working on a project. Other tools include clamps. pliers. screwdrivers. measuring tape. pencils. saws. drills. wrenches.
Where can I start woodworking?
You can learn the most effective way to build furniture by actually building it. While you will need tools, mistakes are inevitable, but you will learn the ropes if you persevere.
Start by choosing a project you'd like to complete. It can be something as simple and small as a box, or large-scale as an entertainment center. Once you've decided on a project, find a local woodworker who specializes in that kind of work. Ask them for their advice about the tools and where they can be found. Ask if you can find someone who does this kind work.
Are there any tips for starting a woodworking enterprise?
It can be difficult to start a woodworking shop. It's worth it if you're passionate and willing to work hard. You'll likely enjoy the challenge of owning your business.
One thing to keep in mind when launching a new venture is that you might encounter unexpected problems along the way. Unexpectedly, money might run out. You might find customers not willing to pay the amount you expected. These situations are necessary for survival.
A good tip is to open a separate bank account for your business. This will ensure that you always know how much money has come in.
What would be your first step in woodworking?
Start off with softwood like pine and poplar. After you are comfortable with the softwoods, move to hardwood.
Statistics
- If your lumber isn't as dry as you would like when you purchase it (over 22% in Glen Huey's opinion…probably over 10-15% in my opinion), then it's a good idea to let it acclimate to your workshop for a couple of weeks. (woodandshop.com)
- Average lumber prices rose about 600 percent between April 2020 and May 2021. (familyhandyman.com)
- Overall employment of woodworkers is projected to grow 8 percent from 2020 to 2030, about as fast as the average for all occupations. (bls.gov)
- In 2014, there were just over 237,000 jobs for all woodworkers, with other wood product manufacturing employing 23 percent; wood kitchen cabinets and countertop manufacturing employing 21 percent. (theartcareerproject.com)
External Links
How To
How to stain wooden surfaces
Staining wood refers to applying chemicals to wood's surface. This chemical reaction causes the wood to change in color. The wood will turn from white to brownish-red due to the chemical reaction. The most common type of wood used for staining is oak, although many other types of wood can be stained.
There are many options for applying stains to wood surfaces. Some methods include mixing the stain along with a solvent like turpentine and then applying the mixture to the wood by brushing or spraying. You can also apply a solution containing water and dye directly to the wooden surface. You can also mix stains with varnishes or paints so that they become part the finish coating.
Preparing the surface is the most important step in staining wooden surfaces. Clean the wood to get rid of any grease, dirt or other substances that might be detrimental to the stain's application. Sanding the wood smooths out rough spots and scratches. The next step is to choose the stain type you want. Penetrating stains are different from non-penetrating. Penetrating and non-penetrating wood stains penetrate deeper than other types, making them perfect for dark colors like mahogany. The best non-penetrating colors are those that work with light colors like maple.
After you've decided what type of stain to apply, get ready for your tools. Because you can spread the stain evenly with a paintbrush, it is ideal for applying them. After you're done painting, make sure to have some rags handy to remove any excess stain. If you are planning to mix your stain, ensure you have enough containers for each component.
After you have prepared your materials for staining, clean the area. You can remove grime and dirt with warm water and soap. Use a dampened sponge and warm water to clean the entire piece. If you intend to stain darker wood, make sure you get rid of any debris.
The stain should be applied next. The stain can be applied by spraying or brushing the stain onto one end of the furniture. Slowly and carefully work your way along the grain to reach the opposite end. Make sure that the stain does not drip off the edge of the wood. Let the stain dry completely before proceeding with the next steps.
Protect the painted surface with a coat polyurethane paint sealant. Apply three coats with polyurethane. Allow the third coat to dry overnight before sanding the final coat.