
Using a template will help you position your patterns on the wood. It gives you reference points for drawing on the wooden surface. A template can also be useful for repeat pieces. It can also be saved for future use. You must first prepare your template. Read on to learn how to create one. Here are some useful tips for creating a template for wood carving. Now you can start to make your patterns on the wooden surface!
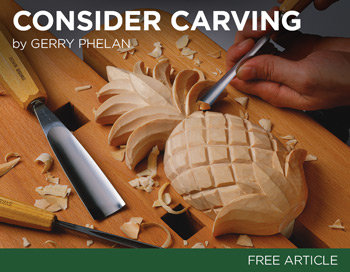
Woodcarving beginner projects
A chess-pawn is a fantastic beginner woodcarving tool. This is because the pawn's rounded edges require more precision in shaping the head. Keep working on the pawn till you reach the desired shape. This is particularly important for beginners, as you will need 16 identical pieces. You will learn the basics of carving curves as well as how to balance your work.
Depending on your skills and the materials you have available, different types of wood require different techniques. Some woods require more advanced tools, while others are simpler to carve. Using the right tools for the project is vital, as working with a dull tool will make the job harder and make it risky for the wood. Start with soft woods such as balsa, birch or birch for beginners.
3D wood carving patterns
If you are a beginner, 3d wood carving patterns are an excellent choice. You can even carve full size bird figures using this type of pattern. For beginners, you will need to use a larger piece for your first project. 3D designs may require more frequent switching of knives. You can also carve bears, either as a cartoon or as a real one.
Because it is round and burly, a bear is easy to carve. It is a good idea to create a 360-degree sculpture of this animal and then find a reference image that shows the main shapes. Once you've mastered the technique, you can either carve the bear with a CNC or by hand. This pattern allows you to be very creative. It is a great opportunity to learn how carved and create a piece that will be treasured for many years.
Dongyang wood carving
Dongyang woodcarving is an ancient Chinese art form which has become a distinct category. This art form has been around since the Tang Dynasty when it first appeared in Taihe year. The legend of the white snake is also often referenced when carving Dongyang wood. As the name implies, this type of carving is highly detailed. Hence, these works are often more expensive than other types of wood carvings.
Dongyang wooden carvings can decorate any kind of wood surface. These works can be displayed both in homes and public places. A popular example is a piece depicting "The Legend of the White Snake." This story is about an immortal snake and his love for a young woman. He was placed under the Leifeng Pagoda. However, he was freed after the pagoda collapsed.
Whittling flower
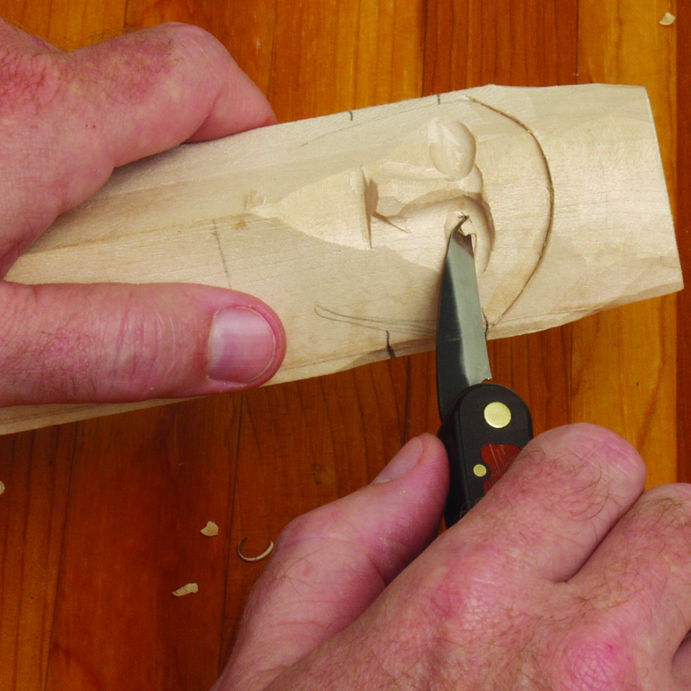
A whittling plant is an excellent project for beginner wood carvers. There are many ways to carve this gorgeous flower. Every one is equally rewarding. First, draw the petals of the flower. This will give you an idea of how the final product will look. Transfer that design onto the wood chunk. This will allow you to visualize the final shape and remove any unnecessary pieces. It also makes carving much easier.
You'll need to have specialized tools in order to carve flowers. A gouge is useful for cutting the petals and background of the flower. You can use a gouge to cut the stems at the same time, redrawing them as you go. You can also carve intricate details with a Dremel. To achieve different shapes, the blade can be adjusted.
Wooden ARO
Aro's wooden ARO drawings can be a fascinating way to collect his work. These artists were committed to preserving old traditions and creating works using old objects. Aro created a wooden relief out of a tabletop, Leipaenkeli. It is Finnish for "bread angel", and Aro did this in 1975. It is made of a simple material but contains many messages about traditional value. Learn more about this artist by visiting his biography.
STEAM-based production allows students to collaborate with multidisciplinary artists in order create a unique piece for public display. Many students choose to work with an established regional or international artist or select a project that showcases the talents and passions one student. Students work with mentors who have been successful in their chosen career fields and focus on their individual journeys. This program targets students from disadvantaged backgrounds and includes community involvement that includes local and international arts communities.
Wooden Cragg
Woodcarvers from all walks of life use this skill to create incredible pieces of art. A popular style is known as 'Pierced Relief,' which involves carving an entire piece of wood from a single block. Other artists are using the process to create abstract pieces that are more abstract, but still contain details of the original piece. A series of wood frames are melted into a metal frame in the DURAMEN series by RemyClemente and Morgan Maccari from France.
Beginners can start by making simple geometric patterns. Then you can learn to carve more complex designs. Try printing out drawings to get a feel of the technique. You can practice by making wooden carving drawings. It is important to carefully follow all instructions. You will have a lot more success carving wood than you think. There are many different designs that you can choose from, including flowers and fruits as well as animals.
FAQ
What's the time taken to finish a piece furniture?
It all depends on how large the furniture is. Boxes and picture frames are small projects that can be completed in one day. Larger projects like tables and desks take many days. It takes time in order to properly stain or seal the wood.
What tools are best to begin with when I become a woodworker
Woodworking is an art. It requires patience. Learning how to use the various tools and techniques necessary for woodworking takes patience.
There are many types of woodworking equipment on the market today. Some prefer to use power tools, while others prefer to use hand tools.
Your choice, however, is up to you. However, you need to ensure that the tool you use is the right one for the job. If you don't have any experience, you may consider starting with a basic set of hand tools.
A router is a tool that cuts intricate shapes in wood. You can also learn how to use it. These are available at most hardware stores.
How do I determine what kind of wood my project is made from?
Always read the label when purchasing wood. The label should detail the wood species, its moisture content and whether it has been treated or not.
Do I have to refinish my furniture?
Yes! You don't have to hire a professional to refinish furniture. There are many ways you can do it yourself. Here are a few suggestions:
To remove stains and scratches, use sandpaper. Next, wipe the surface clean with a damp cloth.
Use clear polyurethane varnish. Allow furniture to dry completely before you move it around.
Acrylic paint is a great way to paint furniture.
Instead of painting, use stain. You can give your furniture a rich appearance with stain.
Shellac wax is applied. The wax will add shine to the wood and protect it.
How long does it take for furniture to be finished?
It depends on the wood type you choose, the complexity and the amount you apply to the finished product. Hardwoods require more care than softwoods. Hardwoods tend to be more expensive that softwoods. They are more durable and can withstand moisture better. It takes between one and three months to finish a piece.
Statistics
- Most woodworkers agree that lumber moisture needs to be under 10% for building furniture. (woodandshop.com)
- The best-paid 10 percent make $76,000, while the lowest-paid 10 percent make $34,000. (zippia.com)
- Overall employment of woodworkers is projected to grow 8 percent from 2020 to 2030, about as fast as the average for all occupations. (bls.gov)
- If your lumber isn't as dry as you would like when you purchase it (over 22% in Glen Huey's opinion…probably over 10-15% in my opinion), then it's a good idea to let it acclimate to your workshop for a couple of weeks. (woodandshop.com)
External Links
How To
Tips on how to drive a nail in wood
First, choose the right size and type of tool to drive a nail through wood. The most commonly used types of Hammers are claw hammers. Each type of hammer has its pros and cons. A claw hammer works well when you're trying to hit nails with a heavy hammer. However it is difficult to precisely control where the blow hits. The sledgehammer works well for large areas, but is too heavy for smaller tasks.
Place your hand flat on the side of your chosen hammer so that the handle rests in your palm. Grab the handle tightly, but do not squeeze too hard. You should hold the hammer straight-up, with your wrist still relaxed. Next, swing the hammer toward the ground and aim for the nail's center. You should feel the impact from the hammer striking a nail. If you're having trouble getting the hang of swinging a hammer, practice with a block of wood until you get the rhythm down.
The hammer should be held close to your body when you are ready to begin driving the nail. You will need to position the nail so it is parallel to the wood. Keep your eyes on the tip. Swing the hammer forward, then follow through with the motion of the hammerhead. This can be repeated several times to increase the speed of your swing. After mastering the technique, you can add power to your swings. You can hold the hammer over your shoulder and forcefully bring it down. This will help you put more energy behind each of your moves.
Once you have successfully drilled the first hole in the nail, remove the hammer. The rest of the nails can be pulled out using a screwdriver, pry bar, or a hammer. Keep the nail heads parallel to the board's surfaces in order to avoid splitting wood.