
If you're a beginner and want to start a scroll saw project, you'll find that the most challenging ones to find are the ones with complex steps. These patterns require knowledge in woodworking and scrollsaw patterns. You should not attempt them until you are comfortable. After mastering the basics, you will be able to move on to more difficult projects. For example, you might start with a panel that is made from the lid of rectangular boxes and paint it to make it look beautiful.
Wood
Scroll Saw patterns may interest you if your passion is woodworking. These patterns are created by professional woodworkers and are available in a variety of sizes and materials. These patterns can be printed out or downloaded in many formats. Scroll saw patterns are an excellent way to get started in this popular craft. Start by buying some wooden scroll saw patterns.
Clear masking tape, or contact paper, can be used on the wood to protect its surface from damage when you remove the template. These materials protect your wood from becoming splintery and dingy. This tape is ideal if you plan to stain your patterns. The glue inside the tape will lubricate the blades while you're cutting. Protective coverings for your wood can be made from contact paper, shelf liner or even newspaper.
Polywood
There are several methods of attaching woodworking patterns on wood. Spray adhesive is one of the most popular methods. It comes in a container and can be found in the glue section at your local supply store. There are two types of permanent bond: temporary bond and permanent. Your choice of the type depends on how complicated your pattern is and the amount you want to apply tape under it. Here are some guidelines for applying blue tape on wood. Also, remember to keep the saw blade cool while cutting.
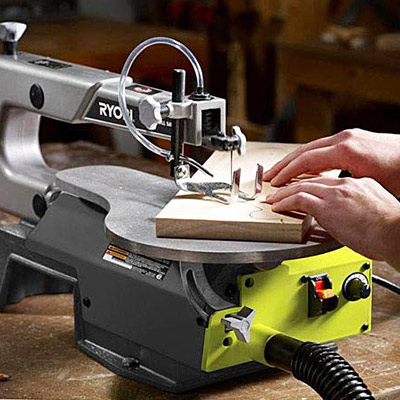
Scroll saws can be used for intricate designs regardless of what type of wood is being used. Scroll saws have the ability to cut wood with pinpoint precision when used correctly. Scroll saw blades are available in a wide variety of weights, so you can choose one that suits your needs. If you plan to use wood, you should choose a blade with a diameter large enough for you to spin your wooden piece 360 degrees. Aluminum work tables are more ideal than wooden ones because they have a smooth surface.
Leather
You can make your own leather crafts by choosing from many different patterns for the leather scroll saw. Start with the simplest shapes if your goal is to learn how to use a Scroll Saw. Easy patterns are ideal for beginners. They will allow them to get a better idea of the tool. However, scroll saw experience is required for more complicated patterns. You might enjoy the M1 Abrams Tank pattern, which is an American military emblem. This design features a 16 inch long barrel and is easy for anyone to follow. The pattern is also useful for classrooms and the kitchen, where it will nourish the mind as well as the soul.
Inlays are a common type of pattern. It is easy to create these types of patterns. These aren't as difficult as cutting with a table saw but require a steady grip. Inlay designs should be considered when choosing a pattern. It will impact the level of relief and depth of the finished product. In addition, a pattern should be wide enough to cover the kerf of the saw, and it should have multiple levels if the cut requires piercing.
Fabric
There are many types of scroll saw pattern you can choose from if you have a scrollsaw and want to create beautiful, intricate designs. Many patterns can be downloaded to your computer for free. You can use them in a variety projects. Most scroll saw patterns are suitable for beginners, although there are also some for more experienced scrollers. Scroll saw patterns are not only great for creating beautiful pieces but can also be used as decorative pieces and gifts.
Great decor patterns are often the most in-demand. A circular scroll-saw pattern would look great on blank walls, for example. An oval shape makes it easy to place things inside and gives a room a new look than a rectangular mirror frame. An attractive display for a Christian home could include vintage cars or crosses. There are many patterns that can be made from wooden ornaments for those who want something more unique.
Wooden blocks

This woodworking guide contains 28 different scroll saw puzzle designs, each categorized by difficulty. These patterns include color photos as well as step-by–step directions. These patterns are the result of the hard work of talented artists. These puzzles are great gifts and can be sold at craft fairs. They also make great keepsakes. The book also contains instructions on how to make your own scroll saw designs. It's a great resource for beginners, but is worth the money for experienced scrollers as well.
A scroll saw pattern can be useful for many things, including storage and decorative projects. It also allows you to learn how to operate the scroll saw. This wooden block set is a simple way to make things at home. Patterns that have detailed instructions are best for beginners. Beginners should start with the smallest patterns and move on to the larger ones as they gain more experience.
Man made planks
Whether you're just starting out with woodworking or are looking for more advanced projects, there are many ways to find the right scroll saw patterns. Scroll saw patterns are best found in a book. Scroll saw books can be found almost anywhere there are books. Although they may seem difficult to find, they are easy to find. Scroll Saw Woodworking & Crafts, for example, offers patterns for their featured articles. Their website has more information about woodworking.
Scroll saw patterns from the late 1800s are particularly important because of the history and craftsmanship that went into them. Some patterns date back centuries. Experts estimate that around 80 percent of these patterns have been lost. Ernie Lang is a scrolling historian who has successfully recreated nearly one hundred and fifty projects with these patterns. He has recreated four scrolled Bachman patterns, which are on display in museums as well as private homes.
FAQ
What time does it take for furniture to be finished?
It depends on the size of the piece of furniture. Boxes and picture frames are small projects that can be completed in one day. Larger projects, like desks or dining tables require several days. It takes time to properly stain and seal wood.
Do I have the potential to make a decent living doing this?
Yes! In fact, most woodworkers already have it. According to the U.S. Bureau of Labor Statistics, the median annual woodworker wage was $34,000 in May 2012. This is significantly higher than the national average, which is $31,000 per year.
What is the difference between plywood and particle board?
Plywood is made of layers of wood that are pressed together under pressure. Plywood is available in a variety of thicknesses. It is often used to make cabinets or flooring. Particle board is made of sawdust and resin that has been compressed into large blocks. It is used primarily for home improvements. Both boards can be cut easily and are both durable.
Can I refinish furniture that I make?
Yes! There are many different ways to refinish older furniture without the need for professional help. Here are a few ideas:
Use sandpaper for removing stains and scratches. Finally, use a clean cloth or sponge to clean the surface.
Apply clear polyurethane paint. Allow to dry thoroughly before moving furniture.
Acrylic paint is a great way to paint furniture.
Use stain instead of paint. The furniture will get a rich look with the stain.
Apply shellac wax. The wax will add shine to the wood and protect it.
Statistics
- The best-paid 10 percent make $76,000, while the lowest-paid 10 percent make $34,000. (zippia.com)
- Woodworkers on the lower end of that spectrum, the bottom 10% to be exact, make roughly $24,000 a year, while the top 10% makes $108,000. (zippia.com)
- Overall employment of woodworkers is projected to grow 8 percent from 2020 to 2030, about as fast as the average for all occupations. (bls.gov)
- In 2014, there were just over 237,000 jobs for all woodworkers, with other wood product manufacturing employing 23 percent; wood kitchen cabinets and countertop manufacturing employing 21 percent. (theartcareerproject.com)
External Links
How To
How to stain wood
Staining wood refers to applying chemicals to wood's surface. This chemical reaction causes the wood to change in color. The wood will turn from white to brownish-red due to the chemical reaction. While oak is the most widely used type of wood for staining purposes, other types of wood are also available.
There are several ways to apply stains to wood surfaces. Some methods involve mixing the stain with a solvent (such as turpentine) and then brushing or spraying the mixture onto the wood. Other methods use a solution of water and dye applied directly to the wood. You can also mix stains with varnishes or paints so that they become part the finish coating.
Preparing the surface is the most important step in staining wooden surfaces. Clean the wood to get rid of any grease, dirt or other substances that might be detrimental to the stain's application. Sanding can smoothen out scratches and uneven spots. Then you must decide what kind of stain you want to use. Penetrating stains are different from non-penetrating. Penetrating and non-penetrating wood stains penetrate deeper than other types, making them perfect for dark colors like mahogany. Non-penetrating stains work best with light colors like maple.
After choosing the type and application method you prefer, gather your tools. You can use a paintbrush to apply stains. This allows you spread the liquid evenly over the surface. A few rags are also handy to clean up any spillages after you have finished painting. If you plan to mix the stain yourself, make sure you have enough containers available to hold the different components of the mixture.
After you have prepared the materials, you can clean the area where you want to stain the wood. You can remove grime and dirt with warm water and soap. Wipe the entire piece of furniture with a rag dampened with clean water. Be sure to get rid of all loose material, especially if staining is planned for darker wood.
Apply the stain next. The stain can be applied by spraying or brushing the stain onto one end of the furniture. Work slowly and carefully, moving back and forth along the grain of the wood until you reach the opposite end. The stain should not drip off of the wood's edge. Before moving on to the next steps, allow the stain drying completely.
Clear polyurethane is used to protect the painted surfaces. Apply three coats of polyurethane sealer. Allow the third coat to dry overnight before sanding the final coat.