Chip carving can be difficult if you've ever tried it. There are many different techniques and styles you can try. But, which one is the best? What tools will you need? This article will share my tricks and tips for carving chips and help you choose the right one for you. Whether you're carving potato chips with a more traditional style, you'll find that there are several essentials for chip carving success.
Traditional
Chip carving can be considered one of the oldest forms in decorative woodcarving. You will need a straight-edged blade knife, but you can also use a skew-ground and offset knife. Chip carving is a technique that involves making small, triangular incisions into wood in order to create a pattern. This art form evolved in different countries simultaneously over 1,000 year ago. It was so popular that many designs looked the same across nations, making it difficult to tell which one was which.
As the practice spread throughout the world, the skills required to carve wood were passed down from generation to generation. Chip carving was used in Sweden to decorate furniture. Schools were eventually established to teach this art. Modern chip carvers have benefitted from the skills and knowledge of centuries-old carvers. Through the generations, knowledge and experience was passed down from carver to apprentice and student. It is a process that lasts a lifetime and continues to this day.
Free Form
Chip carving is something you have always wanted to do. Murray Taylor provides a DVD showing you how to create both freeform or geometric carvings. It's a good introductory project and contains lots of useful information. English and NTSC versions of the DVD are available. The DVD is also available in stereo and widescreen formats. Artisan Media Ltd. is owner of the DVD. The DVD can be downloaded in MP4 format on Windows and Mac computers.

Triangles, lines, and circles are the most common shapes used in geometric chip carving. You can combine different styles with this technique, which allows you to create unlimited patterns and shapes. This is also known free-form chip carving. Your chips can be any shape you like, from a flower to a dragon. A free-form method of chip carving is a great way to incorporate several different techniques into one piece.
Techniques
Chip carving is a tradition that has existed for many centuries. These examples can be found all around the world. Chip carvings have been discovered on paddles and handles for ceremonial tools in the South Pacific Islands. The carvings were likely made using pieces of bone and seashells, although some people also used shark teeth. This book will show you how to create amazing designs by using different chip carving techniques.
You can easily carve chip if your follow some basic steps. The first step is to learn how you can carve the fine triangle. This pattern can be understood and executed quickly. To carve this pattern you will simply need to make several triangles. Then, repeat this process. But this doesn't mean you have to carve boring patterns. By changing the triangles, it is possible to create many different patterns.
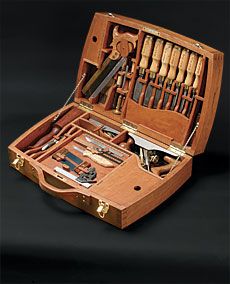
Tools
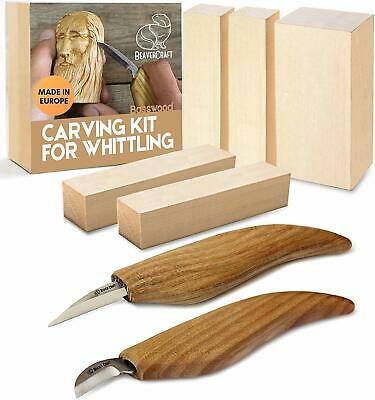
You can learn the basic steps of chip carving by attending a free online seminar from Lora S. Irish. She teaches you how to use various carving tools and supplies, including a chip knife, stab knife, and detail bench knife. Irish will also be demonstrating the different types and uses of wood carving tools. To purchase the right tool, you can choose from this list. These tools can create simple shapes and designs. Or, you can work more intricately to create more intricate designs.
Special geometry is required for chip carving knives. It measures approximately one-half inches in length and has a narrow, curved edge at the back. This allows for precise incisions. To ensure perfect edges, it is crucial to choose a sharp, pointed point. The chip carving knives are made from stainless steel with a sharp tip. A chip carving knife should not be too sharp to cut a single piece of wood.
Getting started
Before you can begin chip carving, it is important to understand the process. The type of carving you want to do will affect the process. To ensure accuracy, it is important to be familiar with the following principles. Chip carving involves making a fine cut in the wood. These are the steps to create your first chip carving.
Sharpening a chip carving blade is crucial. The blade of the chip carving knife will have bevels on each side, indicating that it is a primary chip carving knife. The sharpening stones are shaped like diamonds and can create efficient edges. Place it at a ten degree angle. The stone will simultaneously sharpen both the chip carving knife & chip carving tool.
FAQ
What types of woods are best for furniture making?
Woods are classified by their hardness. Softwoods include cedar and pine as well as cedar and cedar. They're often used for outdoor furniture because they don't rot easily. These hardwoods include maple, mahogany and teak. They can't withstand the elements outside so they're best kept indoors.
How long does it take to finish a piece of furniture?
It depends on the wood type you choose, the complexity and the amount you apply to the finished product. Hardwoods are more difficult to maintain than softwoods. Hardwoods tend to be more expensive that softwoods. However, they are stronger and more resistant to moisture. The process of finishing a piece of furniture typically takes anywhere from one week to three months.
How can I keep my shop organised?
First, make sure you have a designated space for tools storage. To keep your tools sharp and ready for work, keep them clean of dust and debris. To hang accessories and tools, use pegboard hooks.
What kind of tools do carpenters use?
A hammer is the most commonly used tool by carpenters. The hammer is used to pound nails into wood. It is also used to help hold pieces together while working on a job. Other tools include clamps.
Statistics
- Most woodworkers agree that lumber moisture needs to be under 10% for building furniture. (woodandshop.com)
- Overall employment of woodworkers is projected to grow 8 percent from 2020 to 2030, about as fast as the average for all occupations. (bls.gov)
- The U.S. Bureau of Labor Statistics (BLS) estimates that the number of jobs for woodworkers will decline by 4% between 2019 and 2029. (indeed.com)
- Woodworkers on the lower end of that spectrum, the bottom 10% to be exact, make roughly $24,000 a year, while the top 10% makes $108,000. (zippia.com)
External Links
How To
How to make wood joints
This tutorial will show you how to join two pieces of wood together. We will use the pocket hole joint, which is drilling holes in the wood to join them. If your wood has a straight grain, smooth surface, you can use this method. You might consider dowel joinery if your wood isn’t straight or flat. Here are the steps
-
Drill Pocket Hole Joints. First, measure the area where you wish to place the pocket joint. Then drill 3/4 inch deep holes into the ends of each piece of wood using a jig saw or handheld drilling machine.
-
Sand Smooth. You can sand the edges of the wood to ensure that it doesn't split.
-
Glue Together Apply glue on both sides of the wooden plank. Let it sit for about 5 minutes before clamping the pieces together.
-
Secure the pieces together. After the glue has dried thoroughly, secure the pieces so that they are flush.
-
Trim Joinery. After the glue dries, trim any excess wood around your joint.
Make sure to leave enough room between the pieces so that you can turn them inside and out.