
If you've ever wondered about how to finish your door or window, this article is for you. Finishing trim involves several steps. You'll learn how to apply trim correctly and what materials you should use. Once you have mastered the steps, you can apply the trim yourself. These are some tips that will make the process easier. It doesn't matter if your project is DIY or professional, you'll be on your way to creating a stunning door or window.
Techniques
You don't have to be a professional, but you should know how to finish trim. Here are some tips to help you get your project done quickly. The most important tip is to avoid common mistakes novices make when trimming. These are the top tips. These techniques will save you so much time and reduce your headaches.
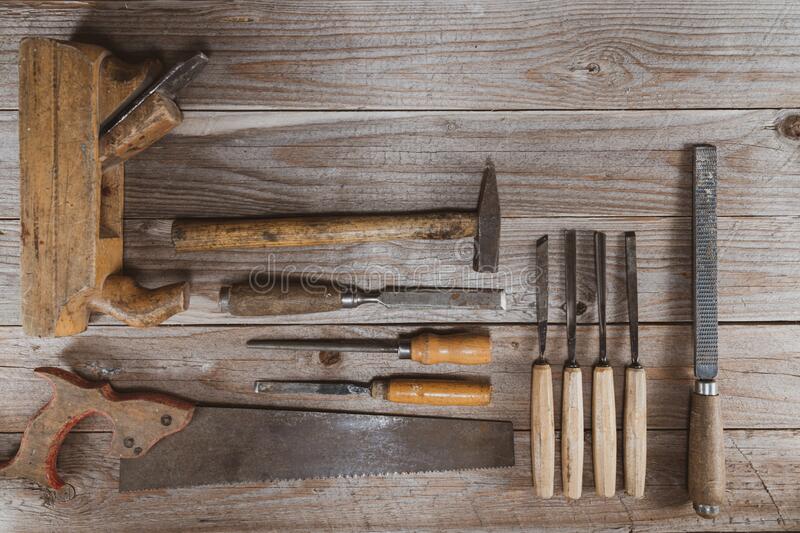
Tools
Sharp pencils are essential tools in any carpentry endeavor. A good pencil is worth the price of its gold when trimming. Just a third of an inch can make all the difference between a good installation and a perfect one. Be sure to sharpen the pencil and purchase enough trim to ensure you have enough for your job. Here are 10 tools that you need to finish trim. They will make your job so much easier. Remember that the sharper the pencil, it will make the job easier to trim.
Materials
You can choose from a variety of materials to finish trim, including wood or synthetic materials. Some types of trim are made from plaster and other materials. Other types are made out of plastic. Trim can also be called casing or molding. This article will provide information on the various types of trim as well as how to properly install them. Be sure to match the decor of your room before choosing trim material. You may want to try different materials in order to find the right one for your home.
Preparation
There are many things that you should remember when you paint. Preparation is not only important for the final result but also for the flow of the project. Make sure you gather all the supplies you'll need and store them in an accessible location. You should thoroughly clean everything after you've collected them. These tips will help you prepare your trim correctly. Once you have cleaned the trim, you can apply the final coat.

Selecting a Finish
There are three types of wood trim paint: semi-gloss or high gloss. Each has its own unique appearance. Your house's overall look and trim color will play a role in deciding which color to choose. These are some tips that will help you select the best paint finish to match your home. To make choosing a paint finish easier, we've outlined the three main paint finishes for wood trim. You can read the full comparison below.
FAQ
Can I make a living doing this?
Yes! Many woodworkers have this ability. According to the U.S. Bureau of Labor Statistics in May 2012, the median annual income for woodworkers was $34,000 This is higher than the $31,000 annual national average.
Do you know anything more about woodworking?
It is easy to underestimate the amount work involved with furniture construction. Finding the right wood is the hardest part. It can be hard to choose from the many types of wood that are available.
Another problem is the fact that not all wood has the same properties. Some woods will crack or warp with time. Others will split or crack. Before purchasing wood, you should consider these factors.
What woods can be used to make furniture?
Woods can be classified according to how hard they are. Softwoods include cedar and pine as well as cedar and cedar. Because they resist rot, softwoods can be used to make outdoor furniture. The hardwoods include teak, maple, mahogany and oak. They're generally used indoors because they won't weather well outdoors.
How do I determine what kind of wood my project is made from?
Always inspect the label when buying wood. The label should include information about the wood species and its moisture content as well as whether or not it has been treated using preservatives.
Where do I get my woodworking supplies?
There are many places you can get everything you need, and you don't have to go far. You can visit your local hardware stores, or you can look online at sites like Amazon.com.
For furniture and other materials that you can reuse, check out flea markets and garage sales.
Statistics
- Average lumber prices rose about 600 percent between April 2020 and May 2021. (familyhandyman.com)
- Overall employment of woodworkers is projected to grow 8 percent from 2020 to 2030, about as fast as the average for all occupations. (bls.gov)
- The best-paid 10 percent make $76,000, while the lowest-paid 10 percent make $34,000. (zippia.com)
- Woodworkers on the lower end of that spectrum, the bottom 10% to be exact, make roughly $24,000 a year, while the top 10% makes $108,000. (zippia.com)
External Links
How To
How to join wood with no nails
Woodworking is a popular hobby. It is relaxing and enjoyable because you can create something useful with wood. Sometimes you may want to join two pieces together of wood without using nails. This article will show you how to do it to make your woodwork projects look great.
Before you can join the wood pieces together, you need to remove any rough edges. You don't want any sharp corners to cause problems later. Once you have done that, you can begin gluing your boards together.
If you are working with hardwood, only one side should be glue. Use glue on both the sides for softwoods, such as cedar or pine. Once you have applied the glue, press down on the boards until they are fully attached. Make sure you let the glue dry before moving on to the next step.
After you have glued the boards together, drill holes in the joints where you intend to place screws. These holes will differ depending on the type and size of screw you are using. If you are going to use a half-inch wood screw, you will need to drill at least 3/4 inch deep.
Once you have drilled your holes you will need to drive the screws through each joint and into the backside. Avoid hitting the board's top surface. Otherwise, you could ruin the finish. Avoid hitting the screws' ends too often when driving screws. This will prevent the wood from splitting.
After your project is completed, you will need to protect it from the weather. You can either cover the entire furniture or just the top. You'll want a product that lasts for many years. There are many options: oil-based varnishes; polyurethane; shellac; lacquer.
You can find these products at most home improvement stores. Make sure you get the right product for your job. Also, remember that some finishes are toxic and should never be used indoors. Wear protective gear whenever you are handling them.