If you have ever dreamed of creating wood-carved caricatures, this is the right place. You will learn all about the design and safety. A standard caricature can be transformed into a masterpiece. These tips will help you create a unique caricature. There are also classes offered by caricaturists.
Techniques
Wood carving caricatures is a rare form of sculpture. These caricatures are funny and tell a story with no words. Caricature is a fictionalized representation of a person. Dave Stetson, wood carving carvers, has a strict code that ensures realistic representations of real people. They also have specific rules that must be followed in order to create effective caricatures. This article will explain the basics of caricature creation and offer tips on how to create one.
First, it requires great focus when carving an astronaut. A spoon carving knife or the whittling blade are required to carve an astronaut. They are both delicate tools. You can also use templates to help you make your work easier while carving the astronaut. A tutorial will give you step-by-step instructions for how to complete your caricature. You might consider buying a tutorial on the subject if you have a tight budget.
Designs
Amusing wood-carved caricatures can be made in many ways. Using a pattern is a great way to start. A cardboard cutout can be purchased and used to carve different types of caricatures. A tutorial on caricature carving can be followed. This article will introduce you to some of the best designs and techniques of carving a caricature.
The first caricature that Fred made was called 'Aristocrats of the Roads'. It showed two men-wanderers. It was made out of Honduras Mahogany. Fred entered it into competitions and won several awards. It was also featured on the Chipping Away Catalog. Fred carved a second Luciano Pavarotti-caricature in 2009, which earned him the Second Runner Up Award at an annual woodcarving convention.
Eyes
Carving caricatures requires that the eyes be realistic. There is nothing wrong in having realistic looking eyes. However, viewers may not be satisfied with a caricature lacking the right amount detail. You can make sure your eyes are perfectly symmetrical by taking a photo of an existing carving. Follow the steps in the photo.
The next step in carving the eyes is to determine the shape of the eyes. Some carvers use the same eye shape as others. Other carvers create more convincing eyes by using different shapes. Stop cuts can be used to make your eyes symmetrical. Lastly, you will need to carve the pupil and the iris. Once you've completed all of these details, it's time to move on with carving the caricature.
Safety
They are distinctive in their designs. They are able to tell a story even without words. The artists who create them take great care in ensuring accuracy. Caricatures often depict people or things in exaggerated ways to convey an impression. Dave Stetson, wood carving carver has established stringent rules for carvers safety and quality.
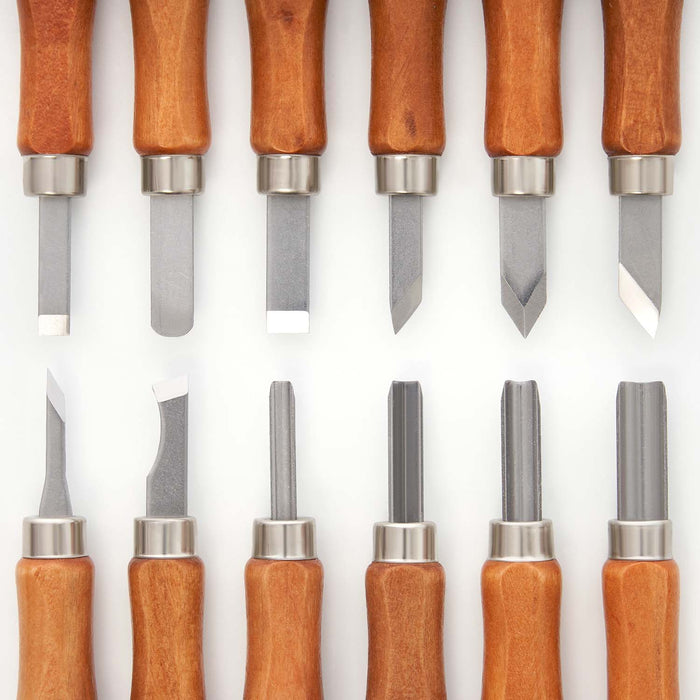
Before carving a caricature from wood, you need to first clean it and remove pencil marks. You can wash the wood with soapy water or dish soap. You can carve the neck or head with a V-shaped tool that is 60 degrees. A 60 degree V-shaped tool, which cuts wood quickly, can be useful in carving. Ramelson's 60° V-shaped carving tool is a good choice. This tool is both sharp, and very easy to use.
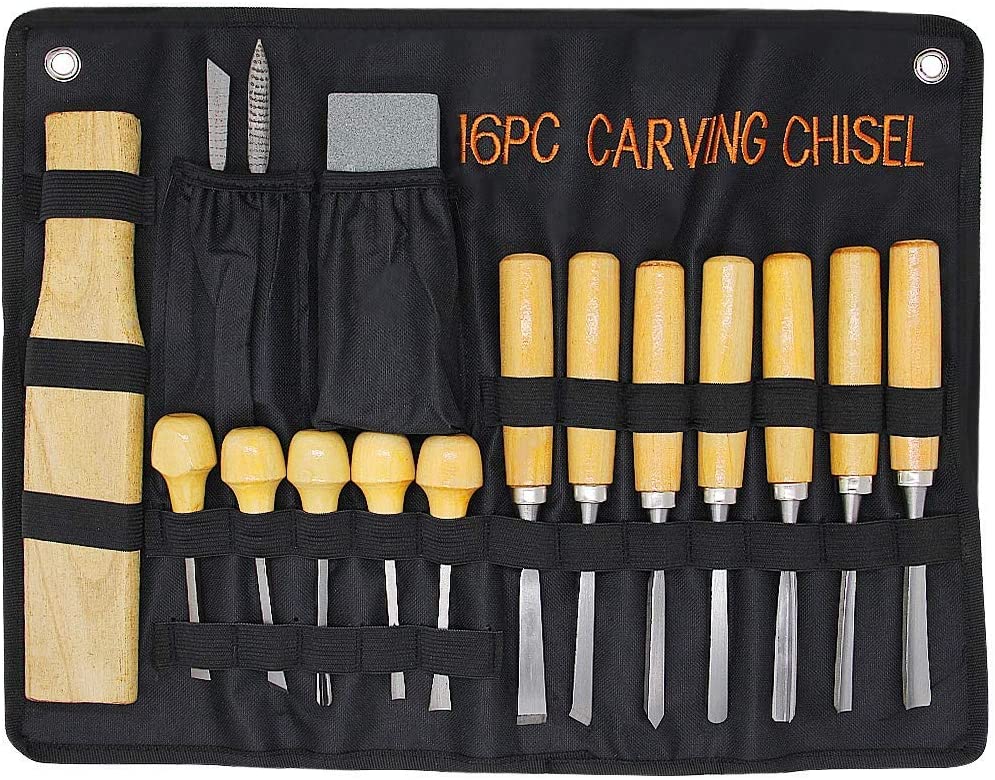
Materials
Learning how to carve animals using materials such as wood and wire is a fun and challenging method. Even though animal caricatures might not be as complex as human caricatures but they are still entertaining and can tell a story with no words. Caricatures often have exaggerated realism. For some, carving caricatures may be a daunting hobby. But for the more experienced carver there are many options.
To complete your carving, you'll need chisels or a woodboard. A hammer is also necessary. Acrylic white paint is used for the first layer. This paint can be bought at craft shops. Once you've completed the base layer, the next layer can be started. The second layer will be a mixture of golden brown paint and some burnt sienna (Academy). For the face, use 2 drops sunkissed purple.
FAQ
How long does it take to finish a piece of furniture?
It depends on the size of the piece of furniture. Smaller projects like boxes and picture frames can be finished within one day. Larger projects like dining tables and desks require several days. It takes time to properly stain and seal wood.
Where do I get my woodworking supplies?
There are many places where you will find everything that you need. For example, you could visit local hardware stores or look online at websites like Amazon.com.
You can also search flea and garage sales for furniture and other materials that can be reused.
How do you know which type of wood you are working with?
When purchasing wood, always check the label. The label should provide information about the wood species, moisture content, and whether preservatives have been used.
How long does a piece take to finish?
It depends on the type and complexity of your design as well as the amount of finishing that you use. Hardwoods, on the other hand, are more durable than softwoods. Hardwoods also tend to be more expensive than softwoods. However, they are stronger and more resistant to moisture. The process of finishing a piece of furniture typically takes anywhere from one week to three months.
Statistics
- Most woodworkers agree that lumber moisture needs to be under 10% for building furniture. (woodandshop.com)
- The U.S. Bureau of Labor Statistics (BLS) estimates that the number of jobs for woodworkers will decline by 4% between 2019 and 2029. (indeed.com)
- Woodworkers on the lower end of that spectrum, the bottom 10% to be exact, make roughly $24,000 a year, while the top 10% makes $108,000. (zippia.com)
- Average lumber prices rose about 600 percent between April 2020 and May 2021. (familyhandyman.com)
External Links
How To
How to drive a nails in wood
It is essential to pick the right size and style of hammer before you can drive a nail in wood. Claw hammers include mallets, claw hammers (sledgehammers), mallets, ball-peen hammers, hatchets, and mallets. Each type has its strengths and weaknesses. A claw hammer, for example, is the best choice if you need to hit nails hard. However, it's not easy to know exactly where the impact will land. The sledgehammer works well for large areas, but is too heavy for smaller tasks.
Once you have chosen the right hammer for you, put your hand flat against its side so that it rests comfortably in the palm of your hand. You can grip the handle with your fingers, but not so tight that it causes injury. The hammer should be held straight up with your wrist relaxed. You should then swing the hammer straight up, keeping your wrist relaxed. You should feel the impact on the nail from the hammer. Practice swinging your hammer on a block of wooden until you feel comfortable.
You can now drive the nail by holding the hammer to your body. Place the nail so that it is perpendicular with the wood's surface. Keep your eyes on the tip. Move the hammer forward and then continue to move the hammerhead. You can repeat this several times, increasing your swing speed. Once you've mastered the technique, try adding power to your swings. You can hold the hammer over your shoulder and forcefully bring it down. You'll have more energy to work with.
Once you have made the first hole, remove your hammer. You can then remove the rest of the nails using a prybar or a screwdriver. Keep the nail heads parallel to the board's surfaces in order to avoid splitting wood.