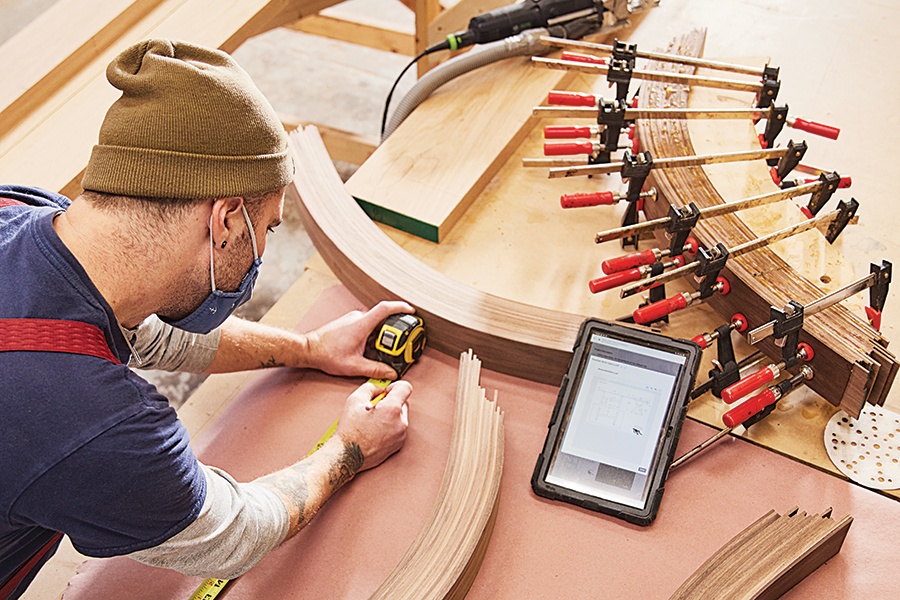
There are many angles that you need to take into consideration when cutting crown molding. These angles include miter, diagonal and spring. For a good fit, it is important to choose the right angle. Here are some tips and tricks to measure the angles for your crown molding.
You can cut a miter angle
The most efficient way to cut a miter angles when installing crown molding is to use the power saw. For miter angles, the saw should be set at 45 degrees to one side or the other. Measure the crown molding length at each corner. You can also slide a testblock under the crown to verify the height. You can also use a measuring tape to make sure the crown molding will fit.

Create a bevel angle
To properly install crown molding, it is essential to understand the angles. Crown molding is standardized in most cases so the angles can be easily determined. There are some factors that you need to consider when cutting bevel angles. First, the spring angle is the angle between the back and wall of the molding when it's being installed. You will find a chart showing the angles of crown molding.
Take a diagonal angle
You will first need to lay the crown molding flat onto your saw table. Next, create a diagonal angle about one-half inch from the end. Repeat this step until you've cut the entire loaf of crown molding. Next, create another diagonal angle approximately the same length as the first. Finally, use a nail gun to attach the crown molding to the backer board. This step requires patience and is very important.
Calculate a spring angle
You will need to measure the wall where crown molding will be installed in order to calculate the spring angle. A measuring tape can be used to measure the angle of corner cuts. A spring angle describes the angle between the back edge of the crown and the wall during installation. Typically, crown molding has a 45deg or 52deg angle. A test block can be used to measure the angle of the spring.
Make a miter joints
Here are the steps for making a miter joints in crown molding: - Place the piece molding on the table. - Adjust the angle of the miterbase to the left. Place the right side on the table. - Cut the piece at the right angle. - Reserve the right edge of the cut. Set the blade at the highest speed. - Always maintain a firm grip. Ensure that your blade is not in the way of the molding.

Keep spring angles consistent
An angle chart, or finder tool, is necessary to ensure consistent spring angles for crown molding. An angle chart indicates the angles between your crown's back, and the wall on which it will be placed. The typical angles for crown moldings include 45deg/45deg, 52deg/38deg, and 53deg/38deg. If you don’t own an angle chart, you may slide a test-block underneath the crown.
FAQ
Where can I purchase woodworking supplies
You can find everything you need in many places. You could shop at your local hardware store or go online to Amazon.com.
You can also look for used furniture at flea markets or garage sales.
What wooden items do you sell well?
Most wooden items that are best-sellers are made from wood harvested sustainably.
Maple, cherry, mahogany walnut, teak, mahogany and maple are the most common woods for furniture.
These woods have beautiful grain patterns and colors. They are also very strong. If they are well cared for, they can last many years.
Wooden furniture should always be painted first to protect against moisture damage. All surfaces should be painted, including doors, drawers, and handles.
Choose a paint with water resistance if you want furniture to last as long possible.
You should use a high-quality oil-based primer followed by two coats of top coat. You may need to apply several coats of top coat depending on how much wear it is expected.
Avoid spray cans or aerosol colors. These products are contaminated with solvents, which evaporate rapidly and can leave behind toxic fumes.
Does it take a genius to make woodworking work?
No. Woodworking is not difficult. It is possible to learn basic tools and techniques that will allow you to create beautiful art.
Do you have the skills to learn woodworking?
Learning by doing is the best way of learning anything. Woodworking takes practice, skill, patience and experience. It takes time to master any craft.
It is the best way to learn to do something is to actually do it. So start small and build on what you have learned from there.
Are there any other things I should know regarding woodworking?
It is easy to underestimate how much work it takes to make furniture. Finding the right wood is the hardest part. There are so many wood options that it can be difficult to choose the right one.
Another issue is that wood does not have the same properties. Some woods will crack or warp with time. Others will split or crack. These things should be considered before you buy wood.
Statistics
- Average lumber prices rose about 600 percent between April 2020 and May 2021. (familyhandyman.com)
- In 2014, there were just over 237,000 jobs for all woodworkers, with other wood product manufacturing employing 23 percent; wood kitchen cabinets and countertop manufacturing employing 21 percent. (theartcareerproject.com)
- The best-paid 10 percent make $76,000, while the lowest-paid 10 percent make $34,000. (zippia.com)
- Most woodworkers agree that lumber moisture needs to be under 10% for building furniture. (woodandshop.com)
External Links
How To
How to stain hardwood
Stain wood is a process that involves applying chemicals to the surface of wood, which changes its color. This chemical reaction causes the wood color to change from white and brownish red. The most common type of wood used for staining is oak, although many other types of wood can be stained.
There are many methods to apply stain to wood surfaces. Some methods involve mixing the stain with a solvent (such as turpentine) and then brushing or spraying the mixture onto the wood. Others use a solution made up of water and dye, which is then applied directly onto the wood. It is possible to mix stain into varnishes and paints, making it part of the finishing coat.
Preparing your wood for staining is the first thing to do. Cleaning the wood thoroughly removes any dirt or grease that could interfere with applying the stain. Sanding can smoothen out scratches and uneven spots. You must then decide on the type of stain that you wish to use. There are two basic kinds of stains: penetrating stains and non-penetrating stains. Penetrating colors penetrate deeper into wood than those that are non-penetrating. This makes them more suitable for darker colors, such as mahogany. Non-penetrating stains work best with light colors like maple.
After deciding on the type of stain, you want to apply, prepare your tools. You can use a paintbrush to apply stains. This allows you spread the liquid evenly over the surface. You should also have some handy rags to wipe up excess stains after you finish painting. You should have enough containers to store the various components of the stain mixture if you intend to mix it yourself.
Once you have prepared your materials, start by cleaning the area where you plan to stain the wood. To remove dirt and dust, use warm water and soap. Wipe the entire piece of furniture with a rag dampened with clean water. If you intend to stain darker wood, make sure you get rid of any debris.
Apply the stain. Apply the stain by brushing or spraying it onto one side of the furniture. Slowly and carefully work your way along the grain to reach the opposite end. Make sure that the stain does not drip off the edge of the wood. Before you proceed with the next steps, let the stain dry completely.
Clear polyurethane is used to protect the painted surfaces. Three coats of polyurethane sealing agent are required. Allow the third coat to dry overnight, before sanding.